
I am starting a series of posts that are going to feature some of my projects in progress, with all the details and secrets of how things are made. I want to show how much time and work goes sometimes into "simple" handmade things.
The Lotus Flower fascinator I am going to write about in this post is a project I started developing for a workshop on Recycled Fashion techniques, but in the process of making it I realized it is too complicated for a beginner to repeat within the amount of time we had allocated for the workshop. So I decided to post it as a free online project for everyone. I tried to capture every step of my work with lots of pictures - have a look and let me know in comments what you think and whether you found it useful!
Starting point for every project of mine these days is waste - whether it is fabric waste, threads leftovers, wires from the inside of old electrical appliances or plastic bits from recycled packaging. Sometimes I have something very particular in mind I want to do (like the fascinator I am going to talk about) and sometimes I just collect the waste I have and let my imagination go wild. 🙂
This time my starting point is a pile of threads I accumulated over time after sewing projects. When sewing I don't throw away end of seams threads leftovers but collect them instead. I use them for various creative projects, I even made a dress out of them! (You can read more about it here). This makes my home production zero waste. I seriously have close to nothing that goes into our normal red bin after sewing! I either reuse leftovers or recycle them.
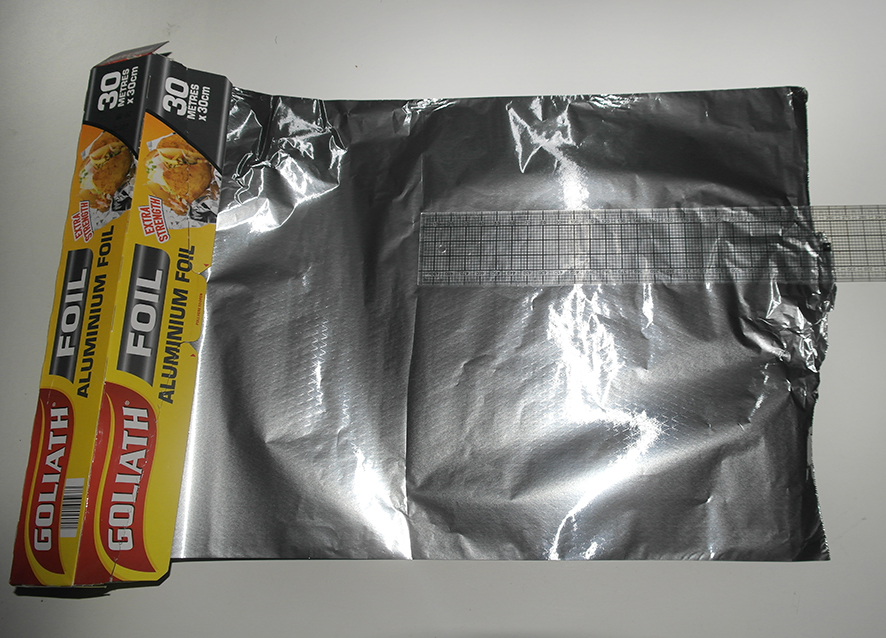
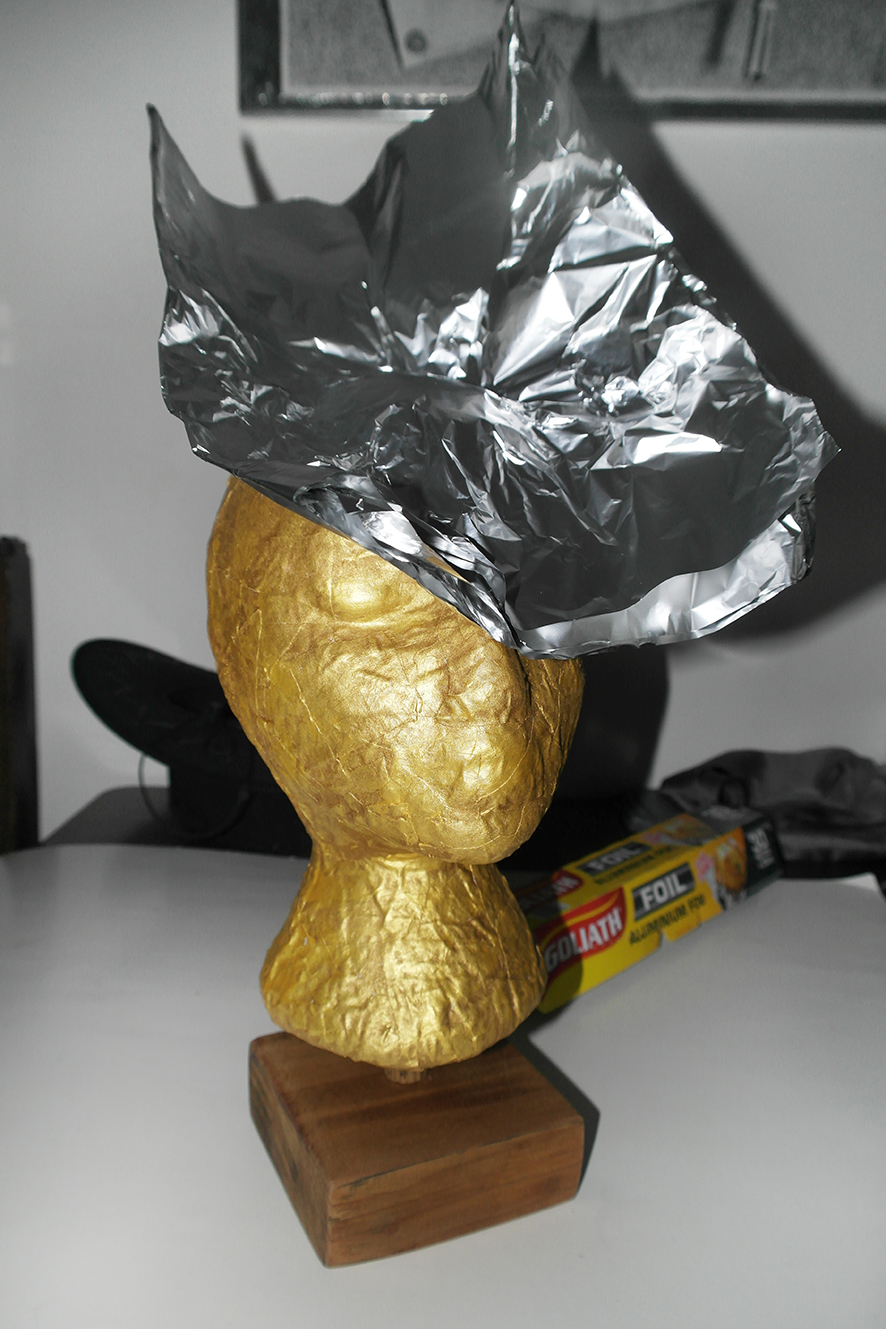
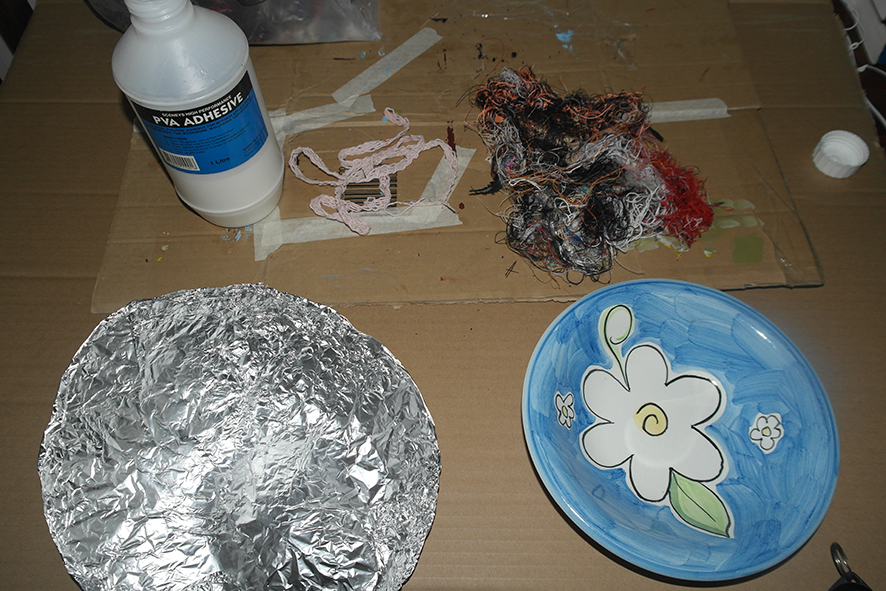
I am going to shape these threads into a Lotus leaf with PVA glue solution. To do so I made a mould from the kitchen foil. I simply folded about 25cm of kitchen foil 5 times and shaped them on a mannequin head until I got something that looks like a leaf to me. See pictures below.
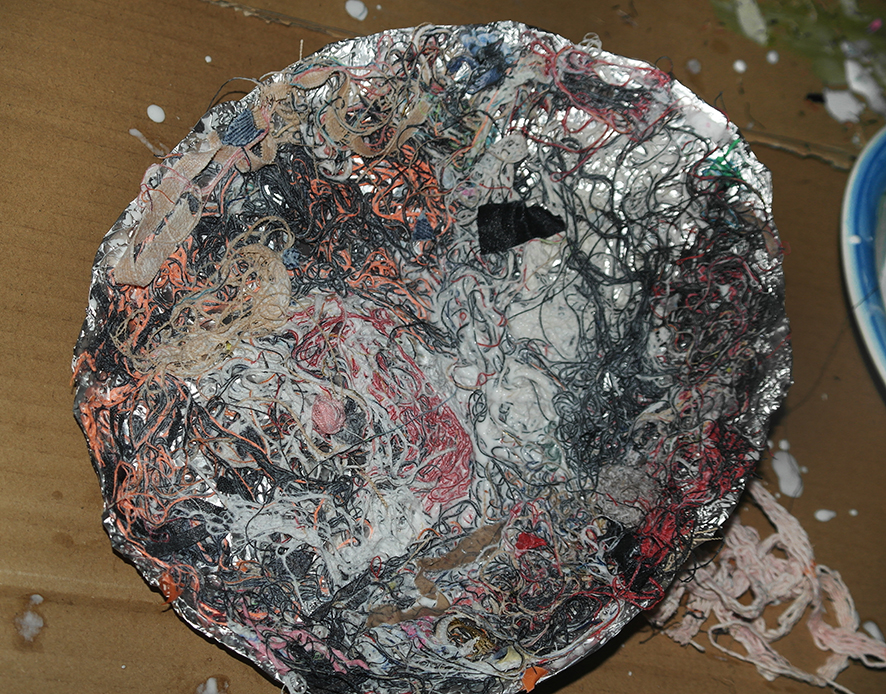
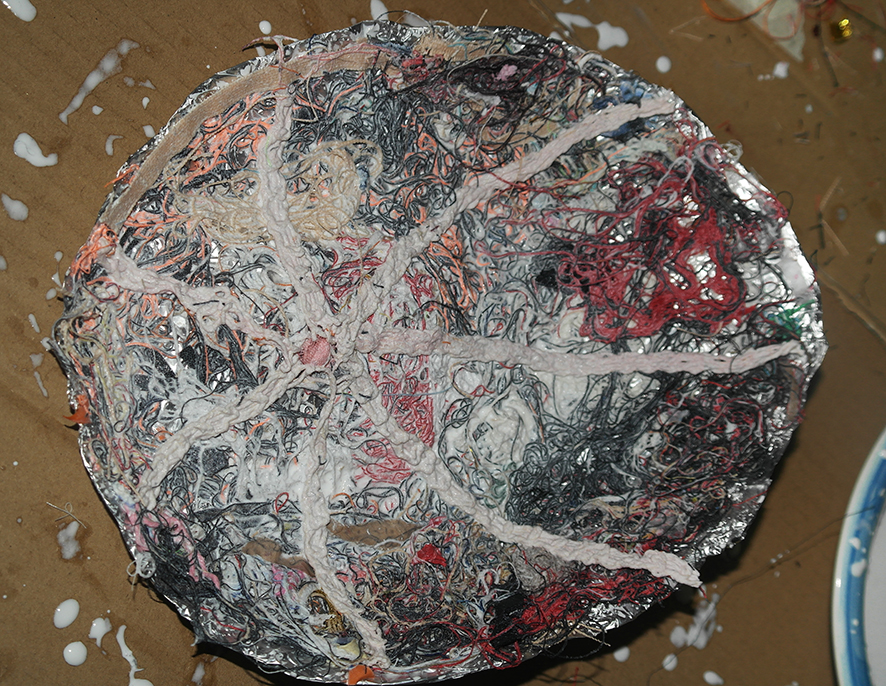
The next stage is to shape the leaf using threads and PVA glue and water solution. I mixed it roughly with 1:1 ratio to slightly thin the glue. Then I took a bunch of threads, dipped it into the water/glue mixture and placed on my foil mould (don't forget to cover the foil with plastic bag!!!). Continue till you have all your mould covered. The concave parts of your mould will accumulate some liquid, this is ok, don't worry, it will dry out. Alternatively, if you don't like that try to make your mixture slightly thicker - you will still have some liquid but not as much.
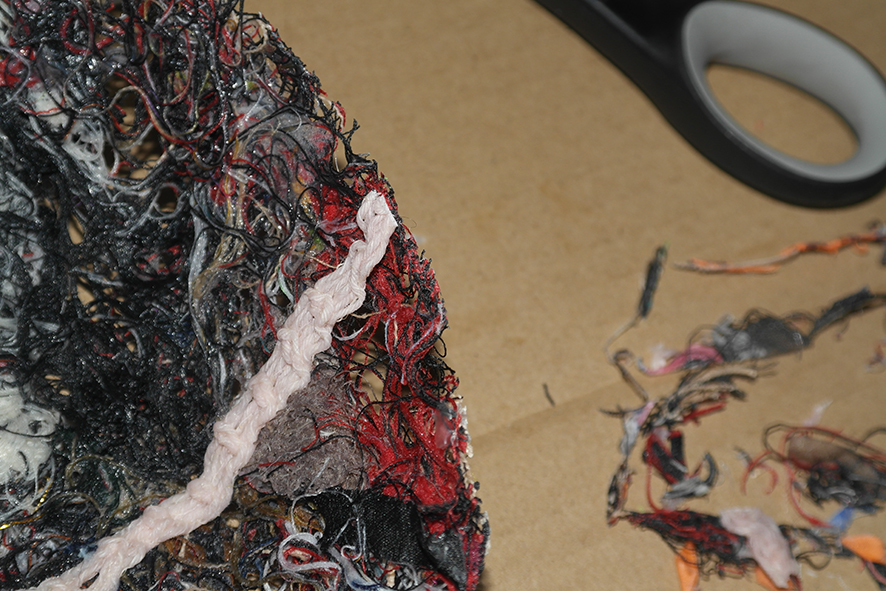
I covered all the foil with a layer of threads. On top of the threads I placed strings, that used to be shoulder straps on an old dress, to imitate leaf fibers. After you finish shaping the threads you need to leave it all to dry. During hot summer days it can dry within 3-4 hours on a direct sunlight. During winter rainy weather it might take up to a week or even more to dry completely.
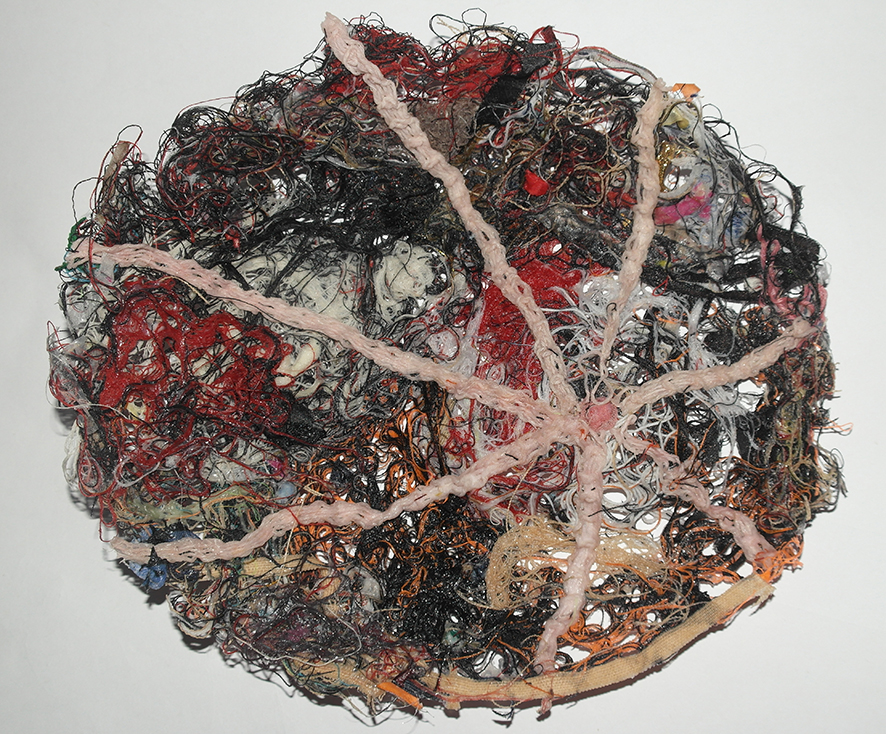
Once the mould is dry you can cut the outlines of your leaf into a nice straight line.
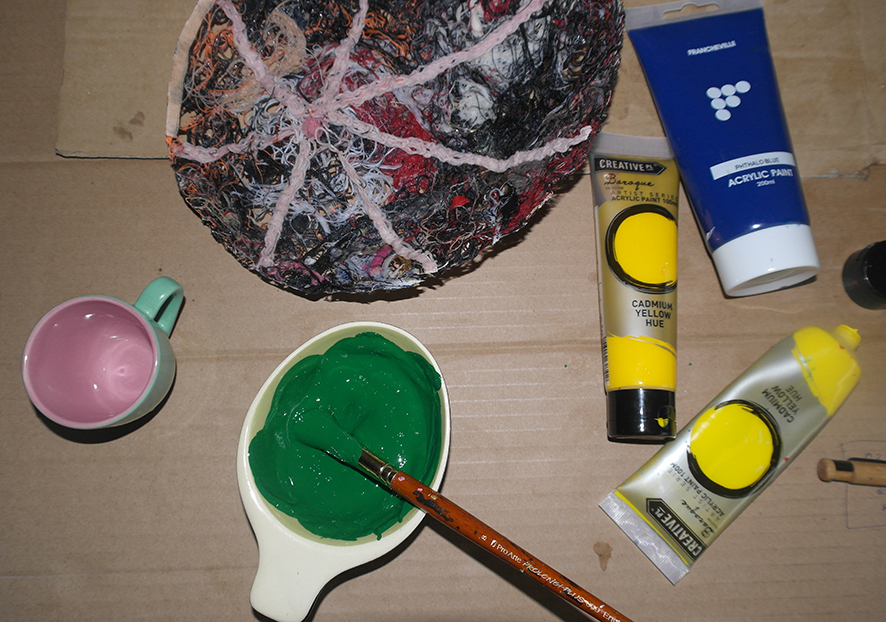
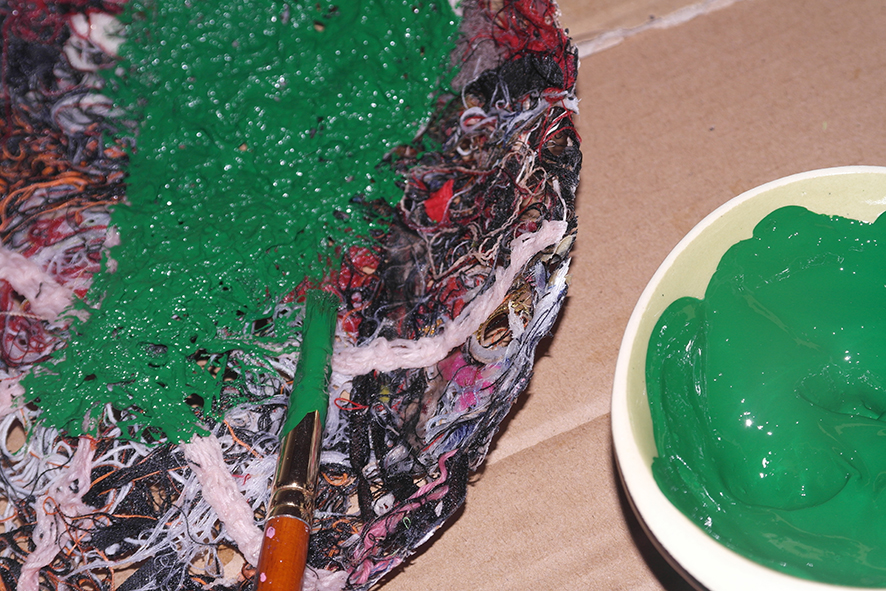
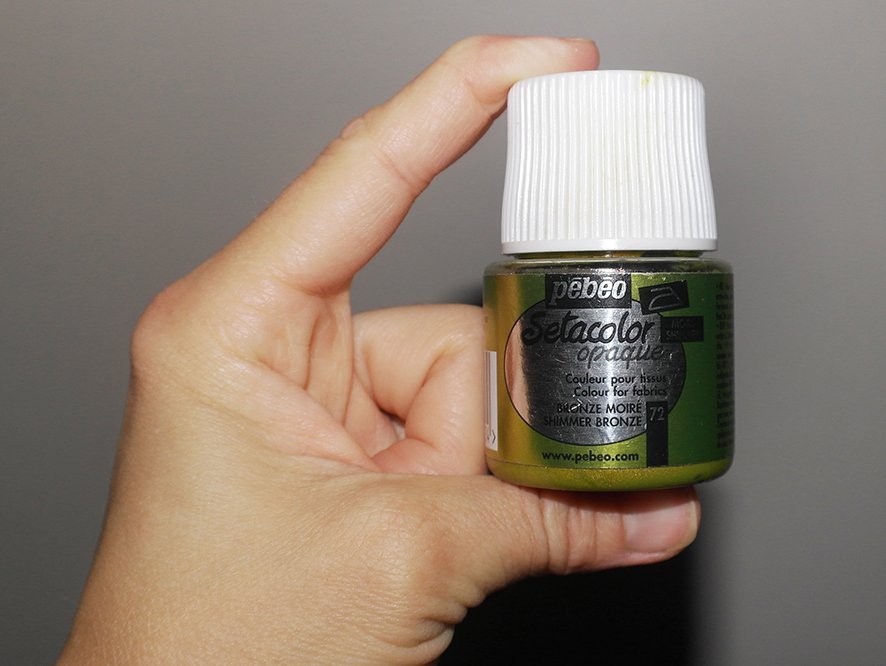
Now the leaf is ready to be coloured. You can use special fabric paint, like this one, for example,but to get your leaf look more or less natural you would need a few shades of green (just one shade will make it too flat). To buy and mix store-bought fabric paint in a few shades of green is rather expensive. I thought I can not afford it. So I decided to turn my regular acrylic paints into fabric paints! In this case I can have as many shades of green as I like with no extra cost. 🙂 This tutorial by Will Gemma explains beautifully how to do your own fabric paint from acrylics. After posting this article Some people noted that the tutorial I refer to could no longer be viewed. There are plenty of other ones online you can find, that particular one was the best as it gave instructions on how to make fabric paint without store-bought acrylic medium. So if you decide to make your paint 100% at home here are rough instructions, you can experiment further to achieve your perfect formula.
DIY fabric medium recepie: First mix glycerin with water with approximately 1:5 ratio (for every one part glycerin, use five parts water.) Equally small portions of the glycerin mixture should be used with the acrylic paint. 1:5 ratio of glycerin mixture to acrylic paint, or even less than that. Let it dry 24hrs and then iron on for better setting and faster drying (if applicable).
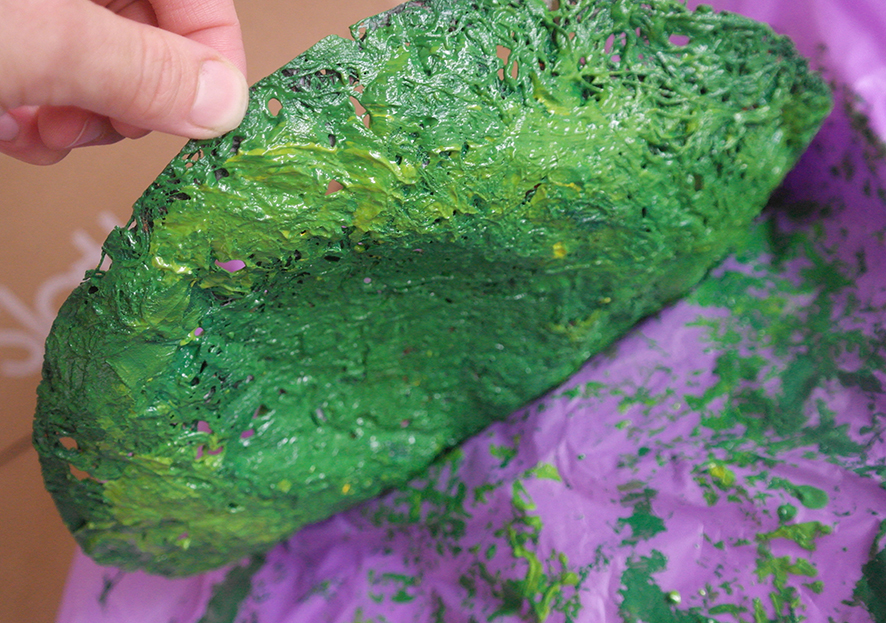
Alternatively, you can paint your leaf with acrylics, but it will be very hard and not that pleasant to touch. So, in spite of the fact that the leaf itself is rather hard from dried glue, painting it with proper fabric paints will make it slightly softer and more pleasant to touch. In my opinion it will also look more natural that way. Have a look at the comments below for more information!
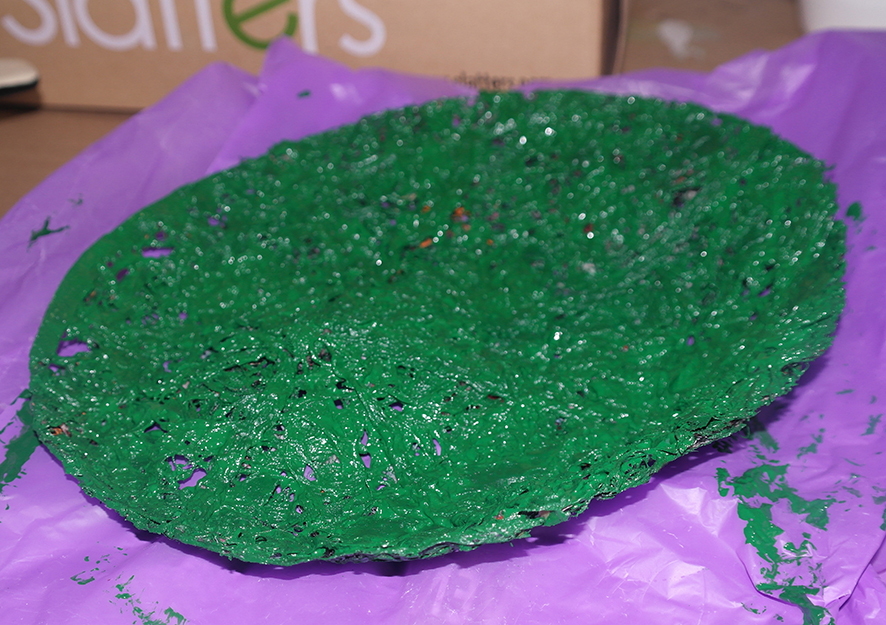
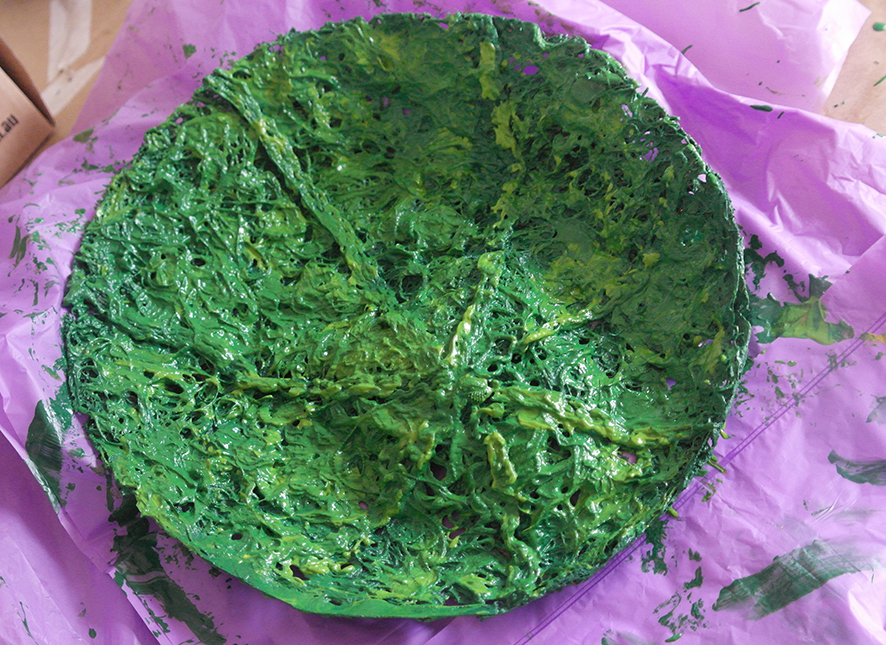
To colour the leaf I mixed two basic colours - phthalo blue and cadmium yellow. I mixed rather dark shade of green to start with. After the base layer was done I mixed lighter green to randomly apply on top to give my leaf more natural look.
Now you have to leave it all to dry again. It might take from 1-2 day up to a week again, depending on weather conditions.
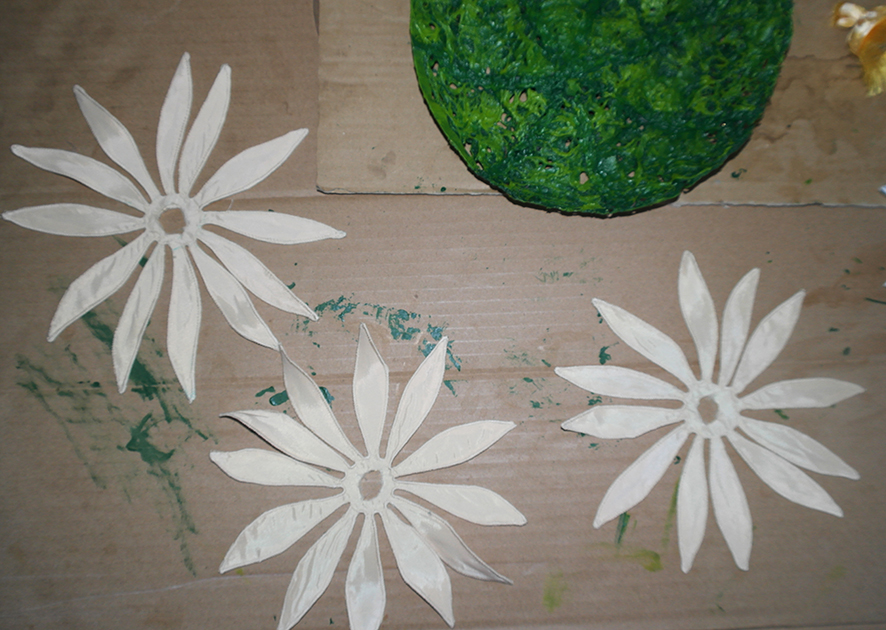
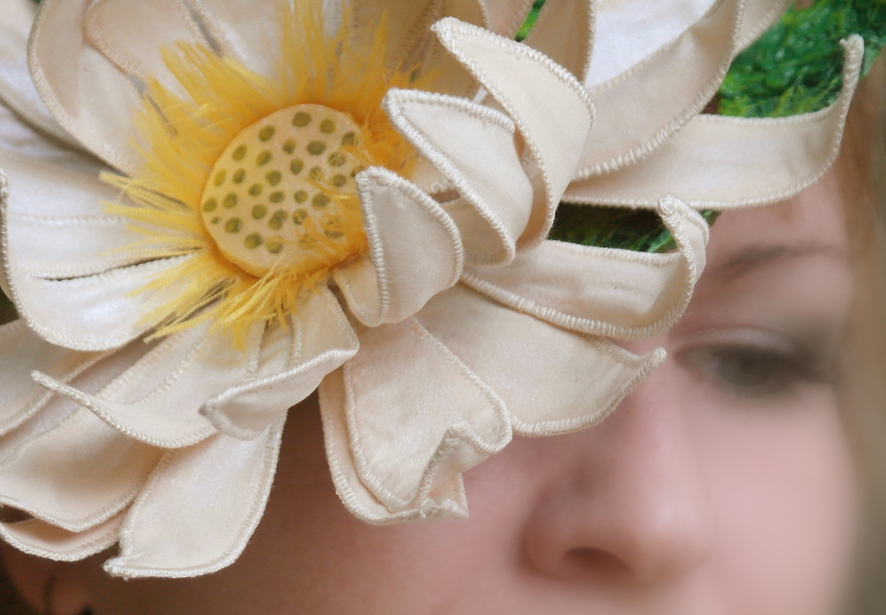
While the leaf is drying you can do the flower. I picked up some fabric leftovers in the coloures I wanted (yellow for the centre and light beige for the flower itself in my case).
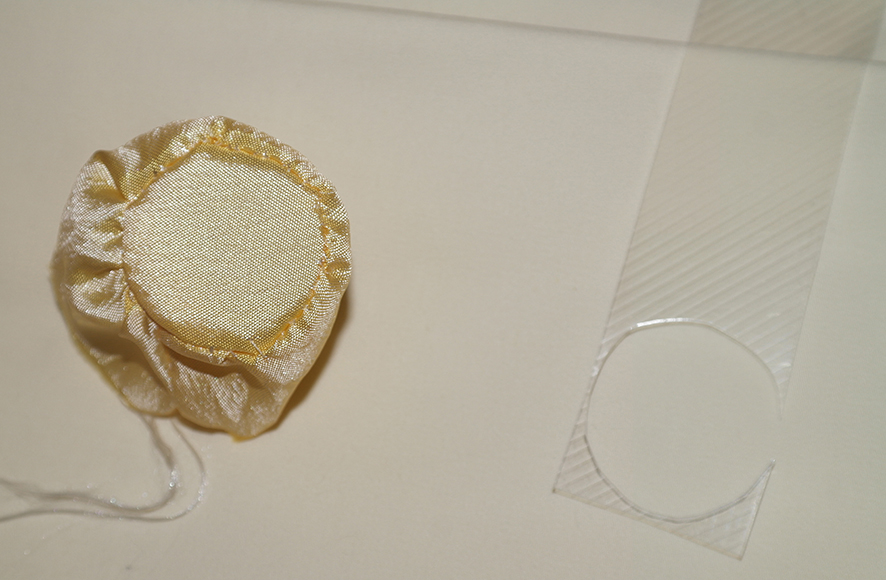
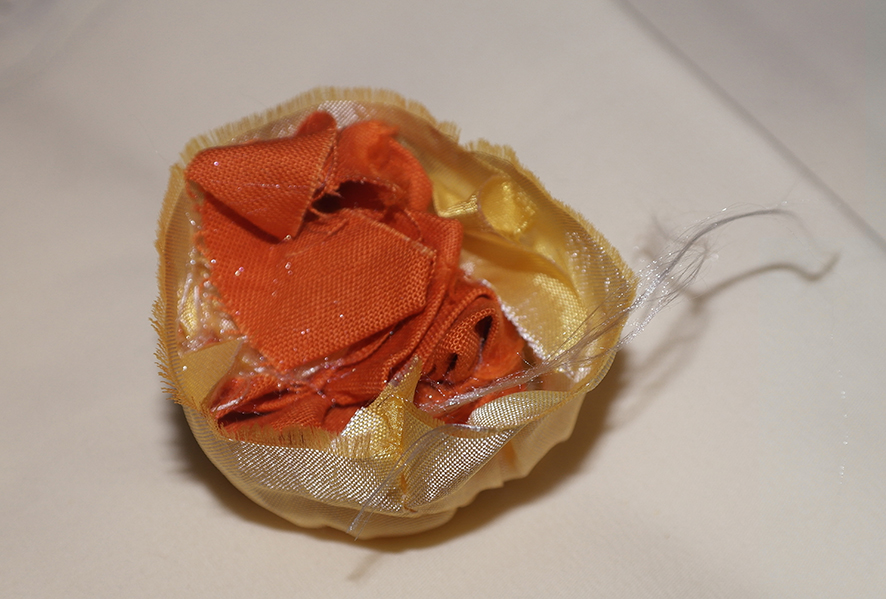
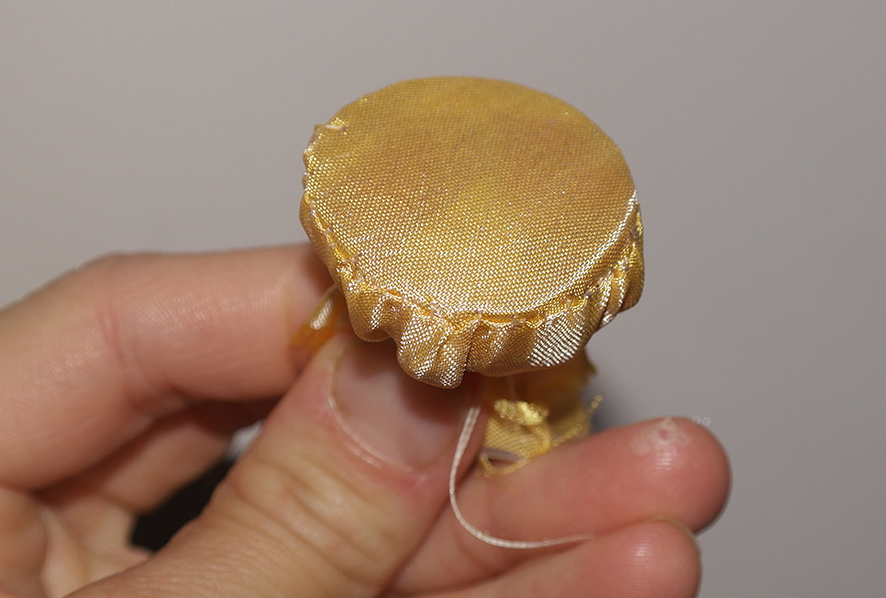
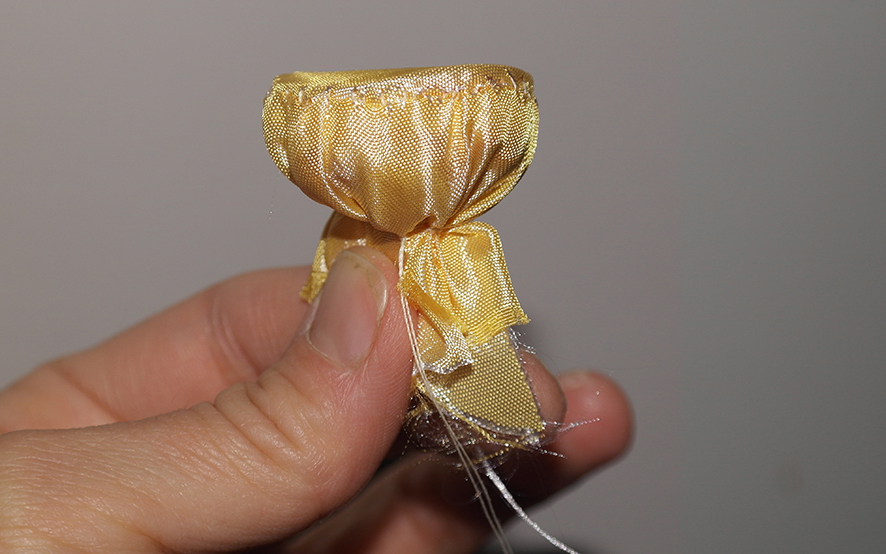
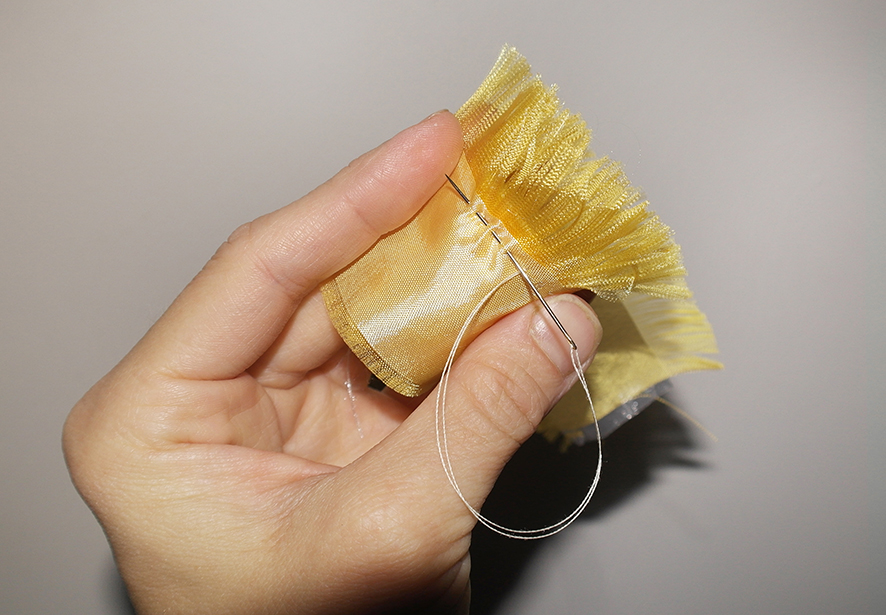
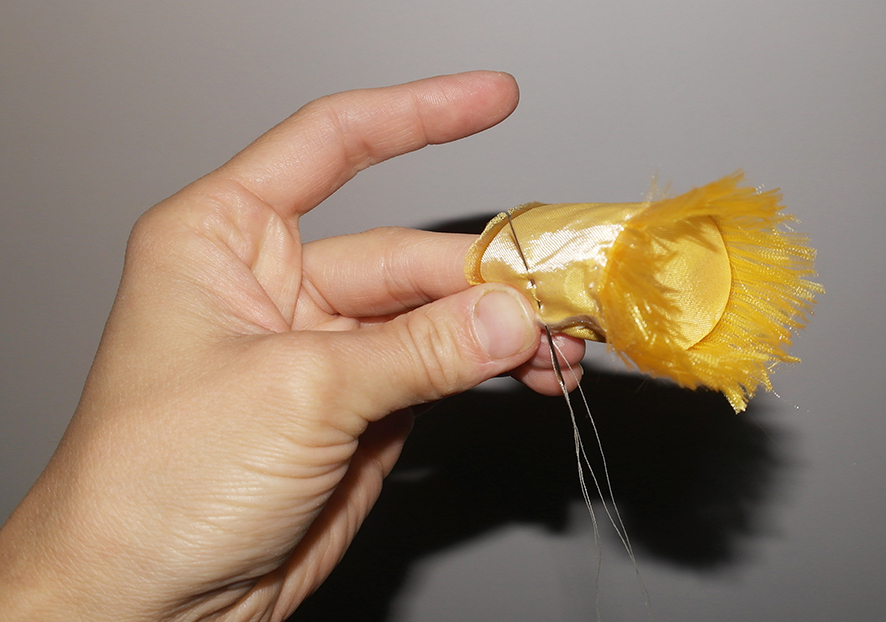
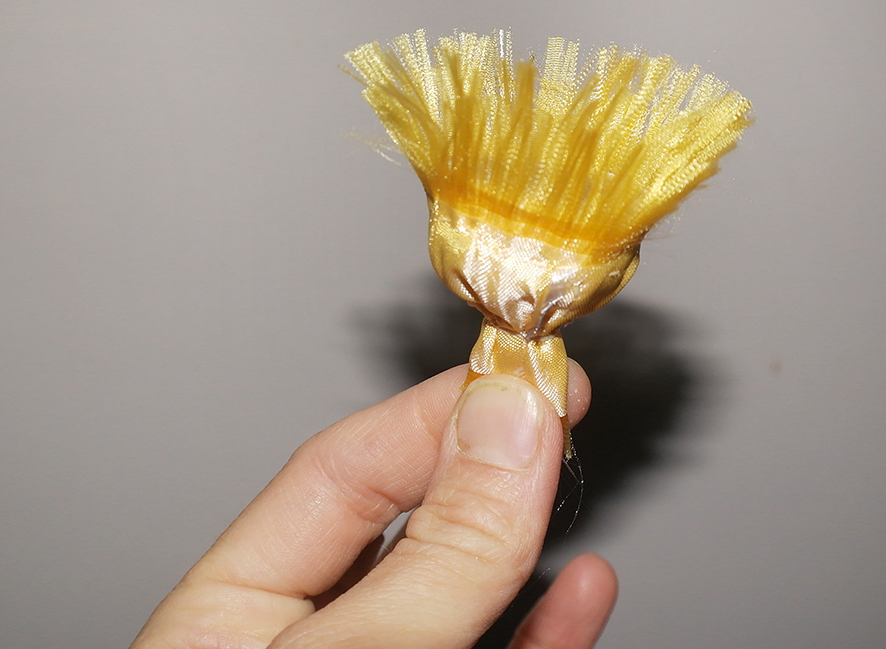
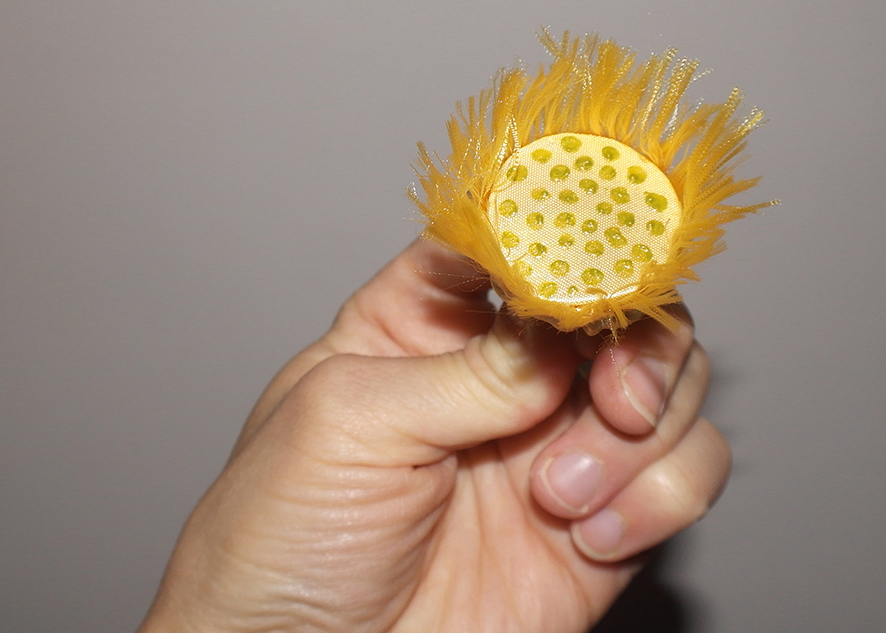
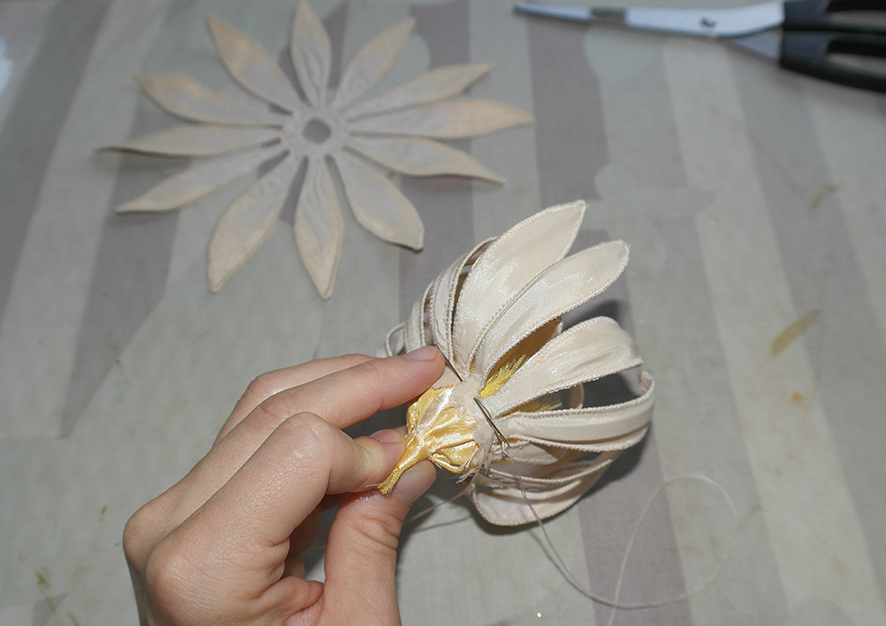
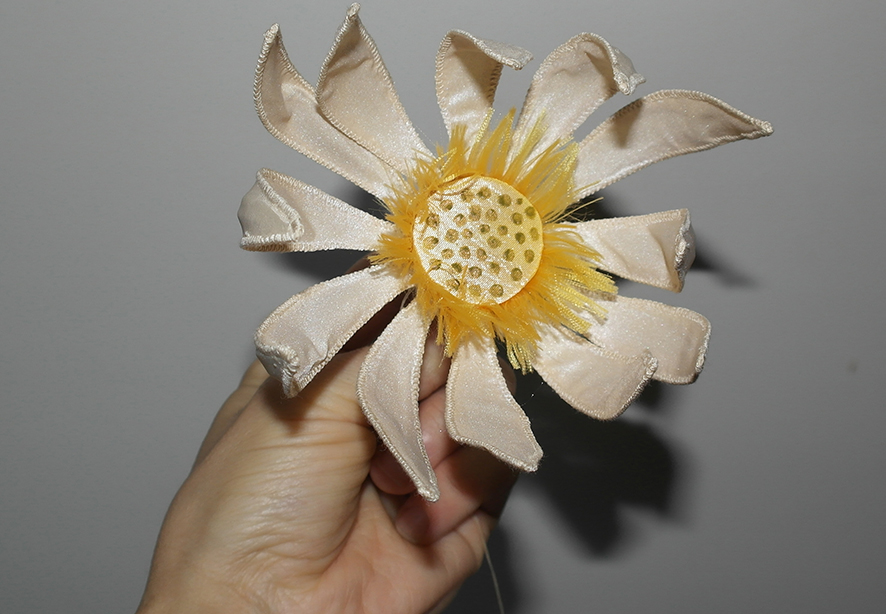
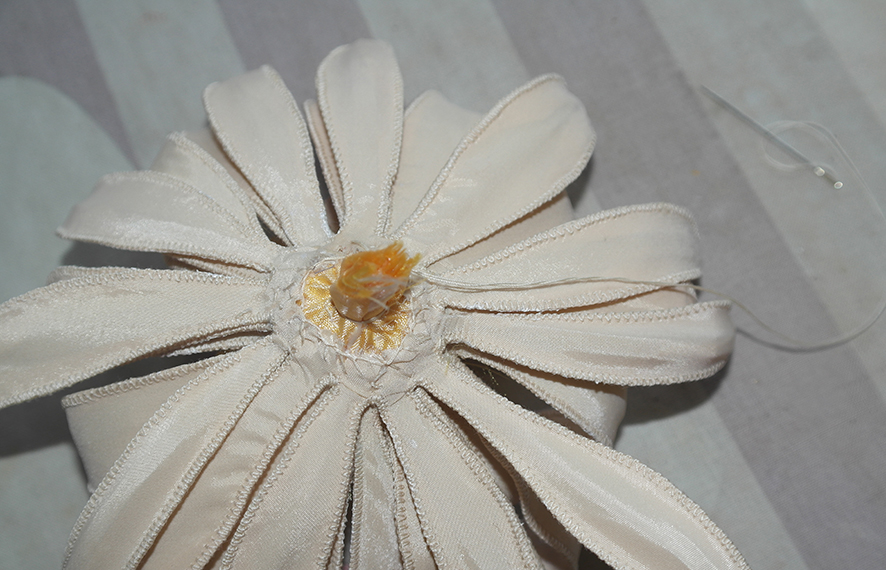
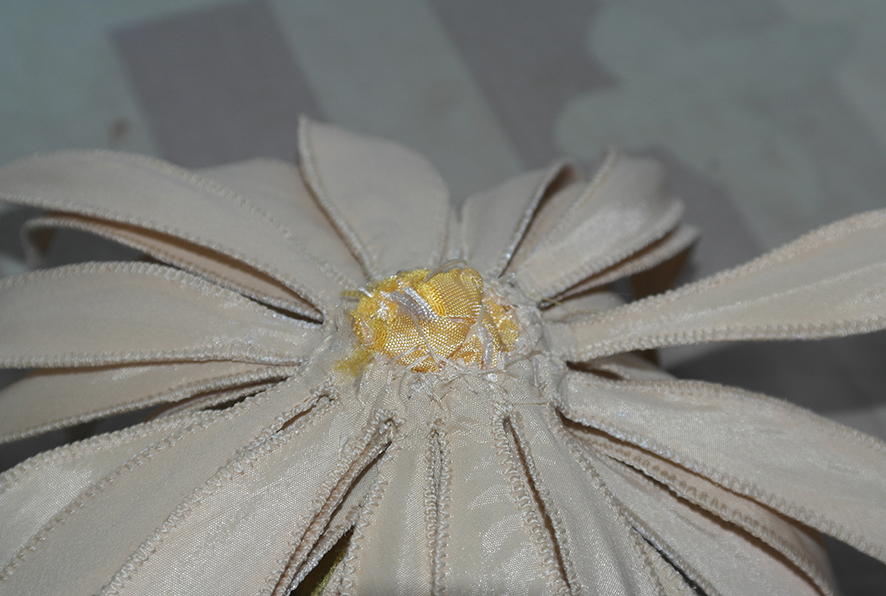
To do the centre I made an open cylinder shape from yellow fabric pieces, inserted plastic circle to the base so that it holds the shape better, stuffed the cylinder with fabric leftovers and gathered at the bottom. Then I attached frayed piece of fabric around it to imitate lotus flower centre and painted some dots with special fabric paint - you can use any fabric paint of appropriate colour for that purpose. You can even mix your own again! I simply happened to have the one on the picture in my closet so I used it.
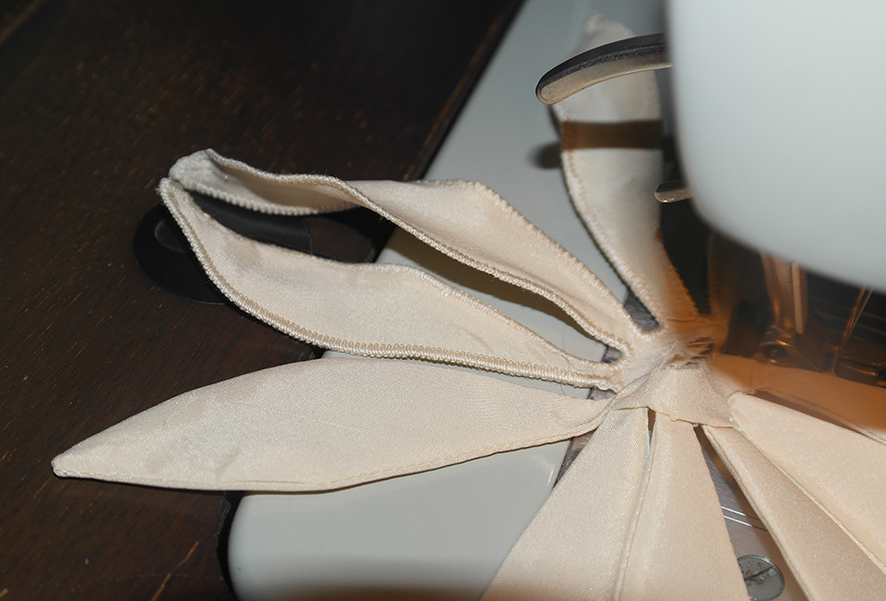
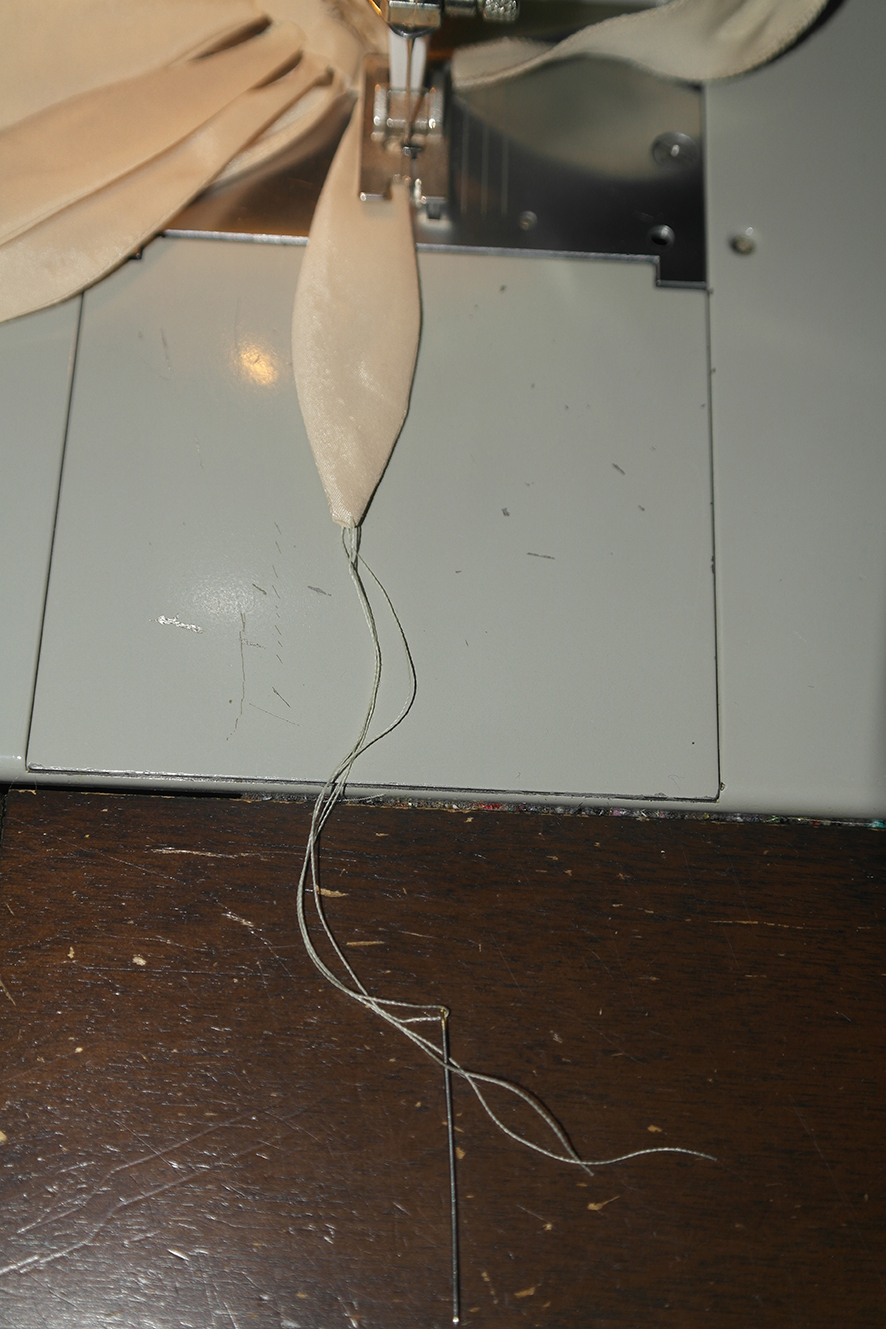
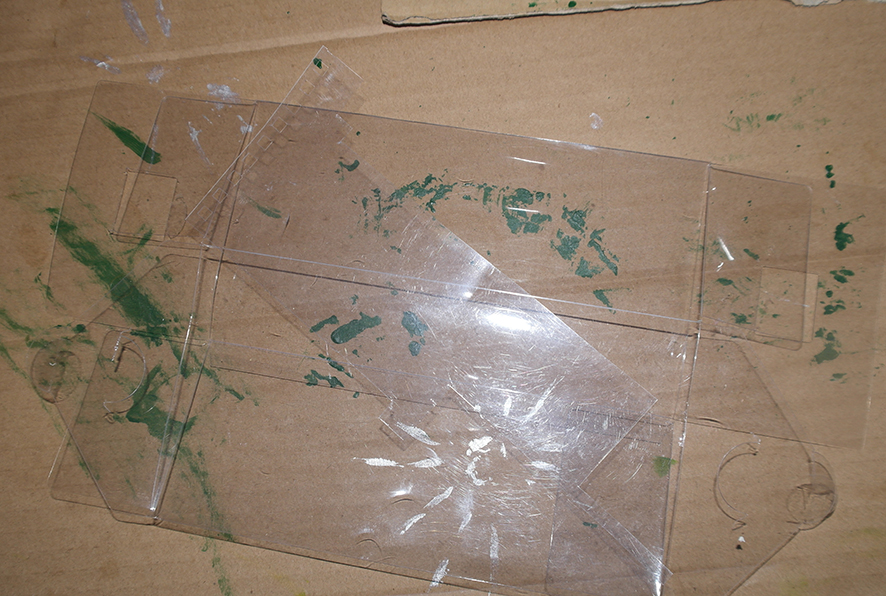
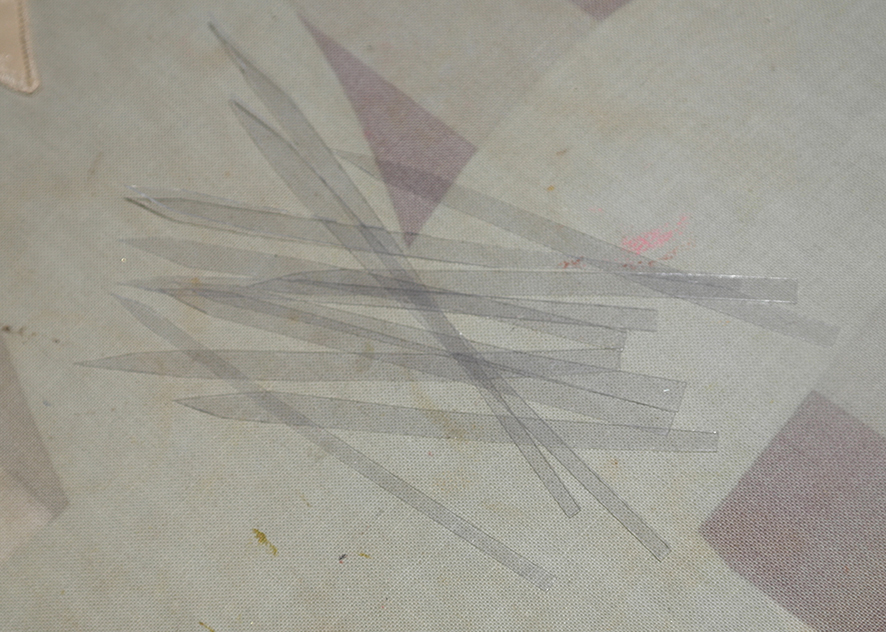
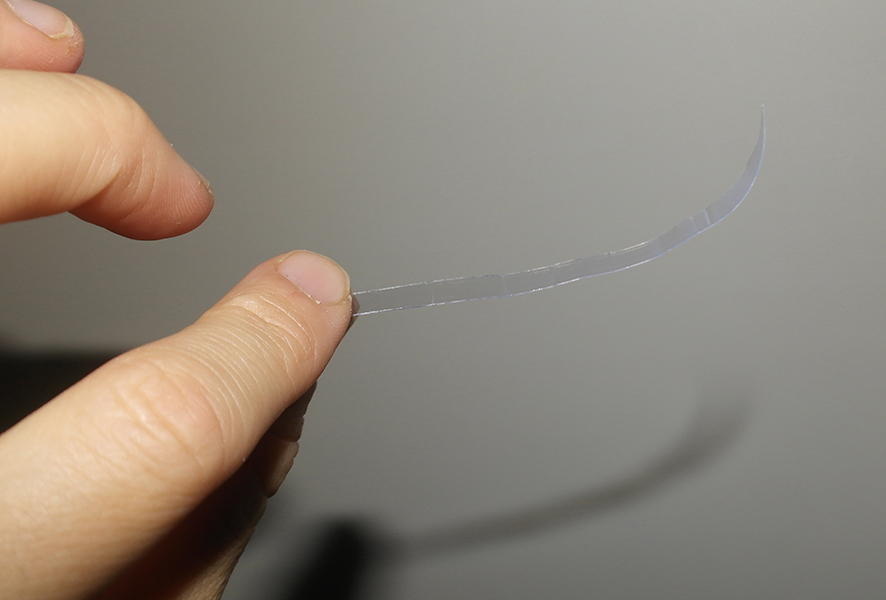
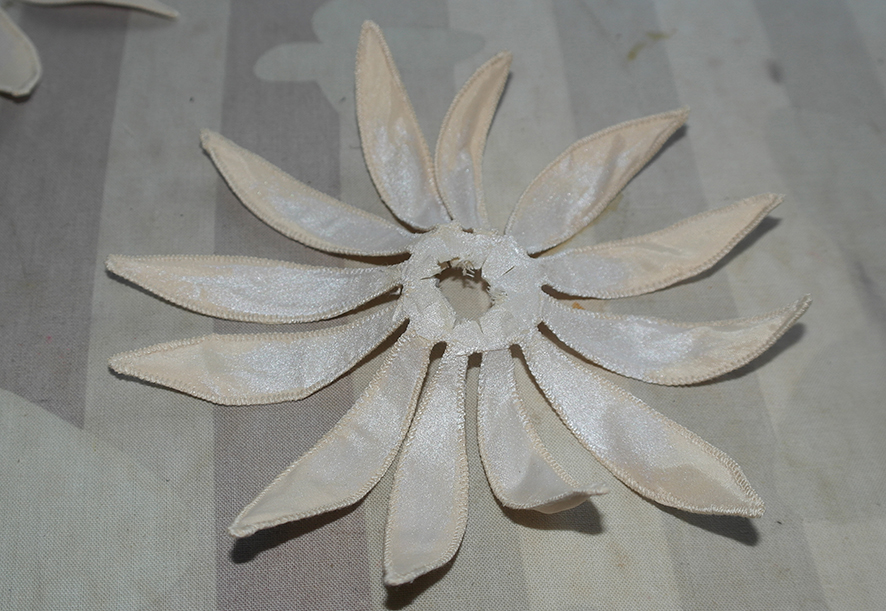
To create the petals I made three rows of petal circles all together, small and two slightly bigger ones, (see pictures below). I first stitched the circles, then turned inside out by cutting a hole in the middle of each circle, then I went with zigzag stitching on the edges. That will make the petals stronger and they will hold the shape better. After all the stitching was done painted the petals with this pearl white fabric paint (You can skip this step or use any fabric paint of appropriate colour here). When the paint dried completely, I fixed it with hot iron and then I inserted plastic pieces cut from some clear plastic packaging leftovers to make the petals hold the shape. I curved the plastic pieces with scissors prior to inserting them to make them look like natural lotus flower petals.
The flower turned out really complicated to do, but I am pretty happy with the result. If you struggle with any parts of the process - contact me or comment below and I will try to answer all the questions!
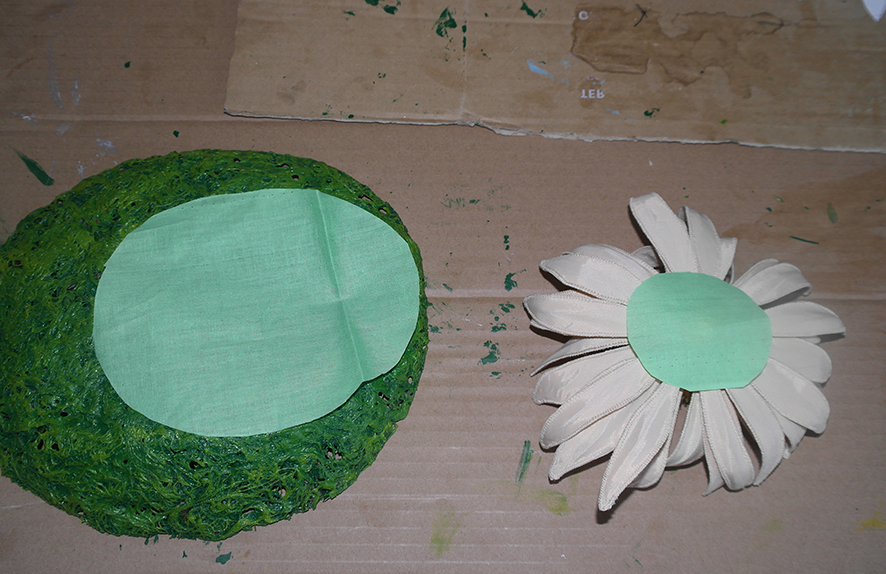
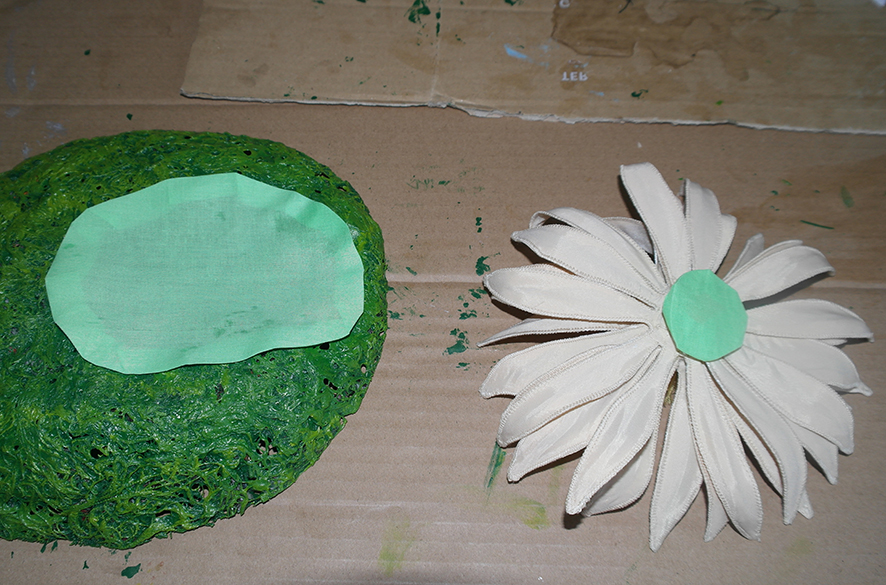
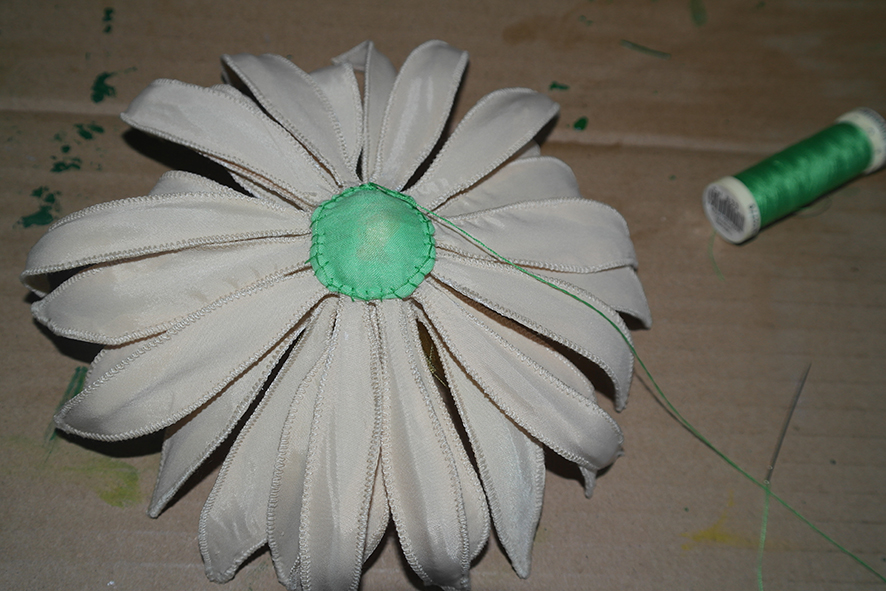
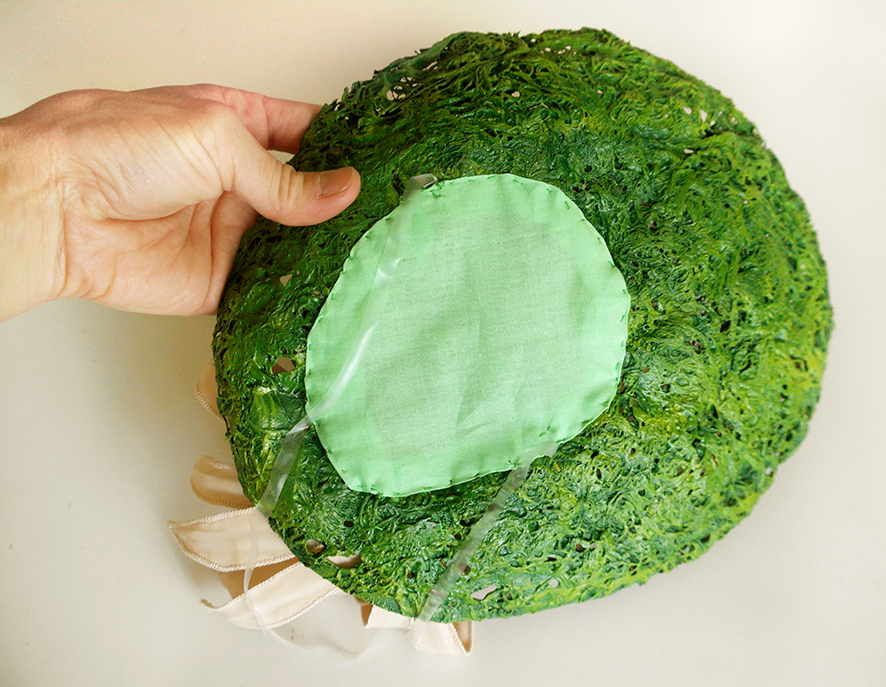
Now it is time to assemble everything together. First I attached a circle piece of green cotton lawn to the bottom of the lotus flower to cover all the stitches. Then I attached it by hand stitching to the leaf where it looked right to me.
I also attached a piece of the same green fabric to the leaf - where it will touch the head. It will make the fascinator more pleasant to wear. To make the fascinator hold on the head I attached a piece of clear elastic to it. See pictures below.
And of course, some pictures of the final result!
Do you like it? Would you wear it? Would you or did you try to make it? Was this tutorial helpful? Let me know in the comments below! 🙂
If you don't have that much time to create this fascinator yourself you can purchase one from me here. 🙂
This clarifies everything perfectly.